

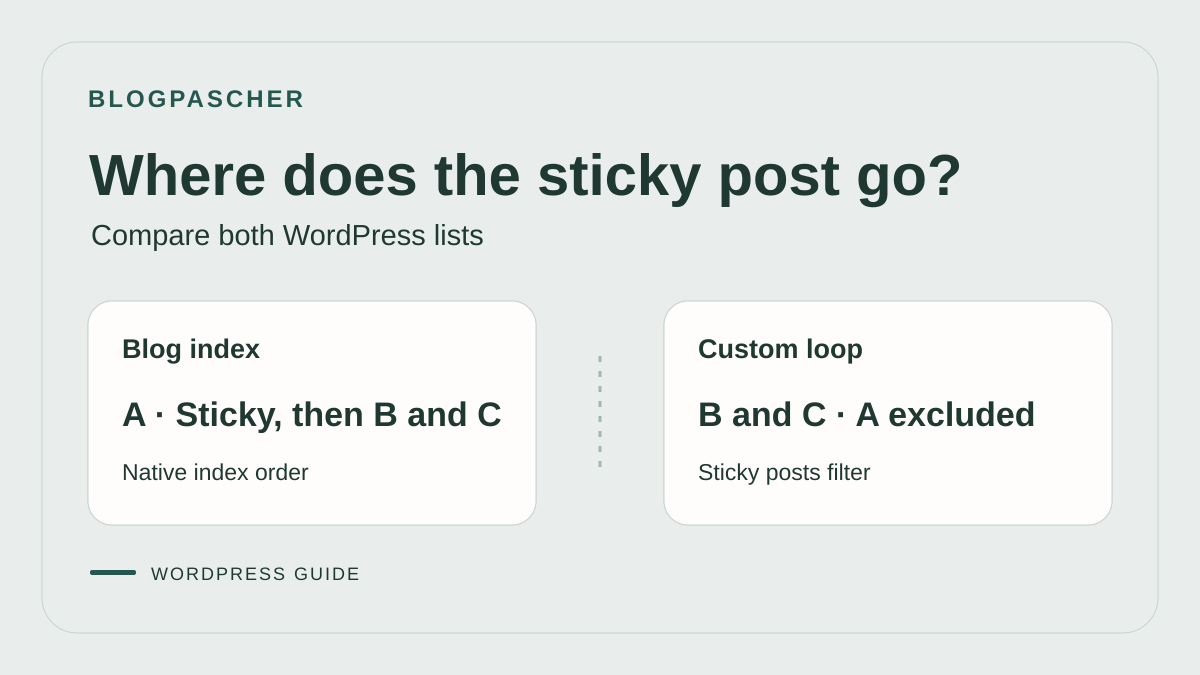
Choose the list where the post should move up
You want to keep a useful post above the latest entries on your WordPress blog. Start by defining where it should appear. WordPress lets you pin a post to the first page of its posts index. Depending on the Reading settings, this index may be the homepage or a separate Blog page. A grid added to a static page, a category archive and a recent posts list may use other rules. The same sticky option therefore does not fix the post's position everywhere.
Open the page where the post should move up and note its address. With access to settings, go to Settings, then Reading, to identify the homepage and posts page. On a page built with blocks, open List View to see whether the list uses a Query Loop. If a template or builder manages the page, locate that area. This distinction helps you choose between making a post sticky on the blog and featuring it locally.
The native procedure applies to ordinary posts. A page or an entry type created by a plugin does not automatically receive the same option. On WordPress.com, commands depend on the screen and permissions. In multisite, check which site owns the post and list template. An account must be able to edit the relevant post and have permission to change its sticky status. Editing a loop in a shared template requires separate template-editing permissions.
Keep a screenshot of the list and note the post's publication date. Define how long it should be featured. For an opening announcement, you could plan to remove it from the top of the blog after the final session. If the post should appear at the top of only one page, a local selection avoids extending its sticky status to the main index.
Make a post sticky in the block editor
Under Posts, then All Posts, open the post to feature. Check its title, status and the date that should remain in place. Open the Post settings and look for the sticky option under status or visibility. It may be labeled Stick to the top of the blog or similar. Enable it, then save the update. If the post is still being prepared, making it sticky does not replace publishing or scheduling it. Check the date and status you want to retain separately.
In the classic editor, open the Publish panel, then Edit next to Visibility. Look for the checkbox that sticks the post to the top of the posts page. Confirm the setting and update the post if you are authorized to do so. If this checkbox does not appear, check that you are editing an ordinary post, that its visibility matches the desired public result, and that your account has the required permissions. A page panel may offer other options without including sticky status.
After saving, return to the administration list. Depending on the interface, the post may have a label indicating that it is sticky. Then open the first page of the public posts index. Check whether the post moved up and whether the following new posts remain in the expected order. To verify its date, also open the post itself and compare it with the initial record. Native sticky status changes how the post is featured without requiring a date change.
To undo the change, reopen the post and disable the same option. Save, then check the public list. The post may remain visible at its normal position according to its date and the filters. If you want to remove it from a list entirely, choose a different selection setting. Unsticking and excluding a post produce two different results.
Understand why a specific page ignores sticky status
If the post moves up on the blog but stays elsewhere in the homepage grid, check how that grid is built. On a block page, open List View and select its Query Loop. For a template, open the template used by that page before selecting the loop. A Latest Posts block, widget or builder may have its own sorting rules. Look for the setting of the list that produces the output instead of saving the same post repeatedly.
A Query Loop in Default mode follows the template's context. This mode may be intentional on the posts index and archives. Avoid converting a category archive's main loop to a fixed query simply to move a post. You could replace each category's own list with the same selection on every page using that template. For a special featured area, a second loop or independent block lets you retain both functions.
In a custom Query Loop, check the content type, sorting and filters. A sticky post may not match the category required by this list. If the template selects pages, the post is not the expected type. A list sorted by title may also display a post in a different position from the blog. Compare these settings with a post that appears correctly and record the difference.
If the blog does not reflect sticky status even though the option is saved, first check that you are viewing its first page and that the list is the main index. If the site uses a theme or plugin that replaces the query, ask how that tool handles sticky posts. The publication date may remain correct while the template's sorting ignores the priority.
Compare the native index and the loop with a control post
On a copy, choose an older post A and a newer post B. Leave B unpinned. If possible, add a post C dated between the two. A and B can share a category while C uses another. Open all three posts directly and confirm that they are public. Then record their order before making a post sticky. In the staging exercise, the first index page and comparison loop display B, C, then A at this stage.
Identify the index under Settings, then Reading. The latest posts index may be the homepage or a Blog page assigned in those settings. In the staging exercise, it is the native homepage. Make A sticky and reload the first page of this index. The test displays A ahead of B and C there. B remains the list's control. If the actual index does not respond, first check A's status and sticky setting, the address opened and the template producing the list.
Now open the other page, which contains the custom Query Loop. Select the loop itself in List View and check whether it uses the template query or a custom selection. In the test, this page remains set to Exclude sticky posts. It displayed A before it became sticky, then displays only B and C. Post A still opens at its address and appears at the top of the index. The comparison shows that the disappearance is caused by the loop setting.
Change the setting that explains the absence
If the loop should display posts in date order, switch from Exclude to Ignore on the copy. Keep the Posts type, newest-to-oldest sorting and three results during this comparison. The test shows B, C, then A again. A remains sticky, and the native index continues to show it first. Ignore allows A to appear as an ordinary post. If you then limit this loop to two results, A disappears from the first list because of its date. It remains in the selection, and pagination, if present, lets you look further.
If you want sticky posts in a list alongside other posts, try Include with the appropriate filters for that list. In the staging exercise, with no filter and three slots, the loop displays A, B, then C. Check the order in your context. A different result may come from sorting, filters or template behavior. Record the observed order instead of inferring position from the sticky option alone.
For a dedicated area, try Only. Control post B must disappear from that area because it is not sticky. If you add a filter for C's category, A no longer matches the selection and the test area becomes empty. Removing this filter on the copy makes A reappear alone. This check distinguishes a sticky post excluded by category from a post missing because the loop removes all sticky posts. On a real list, keep the filter that matches the section. If A should appear there, confirm that it belongs to the expected category before changing its classification.
These three values come from the block saved in the staging exercise. They correspond to exclusion, ordinary ordering and a list reserved for sticky posts. Use these fragments as diagnostic reference points. To change the value, use the block setting in the editor.
"sticky":"exclude"
"sticky":"ignore"
"sticky":"only"
Restore the loop and sticky status separately
Keep the loop's initial setting, post count and filters. In the staging exercise, restoring Exclude and three results removes A from the loop again while the index still shows A first. This step isolates the list rollback. Then unstick A to restore the original control state. Both lists return to B, C, then A. Post dates, categories and links served as reference points throughout the test.
On your copy, restore only the setting you actually changed. If sticky status was already intended before the correction, keep it when restoring the loop. If the page uses a shared template, check another page that depends on it. The report should state where A was absent, which setting changed and what B continued to display. The nine staging states concern the native homepage and a custom core loop. For another theme or a plugin that replaces the list, repeat the same control test in that component.
Create an area reserved for sticky posts
To display a row of featured posts on a static page, open the page and add a Query Loop in the intended area. Use a custom query, select the Posts type and look for the Sticky posts setting. Choose Only or the equivalent label when you want to restrict this list to sticky posts. Add a heading above the area and a simple Post Template, with a linked title and an excerpt if it helps readers choose.
The options have different effects. Only limits the selection to sticky posts that meet the other criteria. Exclude removes them from the list. Ignore removes their priority while allowing them to appear under the ordinary filters. Include allows their presence, with position depending on context and sorting. Check the options offered by your version and choose according to the intended result. A latest-posts list can retain sticky posts in chronological order if you choose to ignore them, or omit them if you exclude them.
If you have two loops on the same page, decide whether a post can appear in both. For example, a ‘Featured’ row can select sticky posts while a second ‘Latest posts’ row excludes them. If you choose Ignore in the second, a recent sticky post can still appear in both. Check with one recent and one older example before applying this setting to the shared template.
Plan for the case where no posts are sticky. With a loop set to Only, the area may remain empty. Use its No Results block if a message is useful, or choose a presentation in which an isolated heading does not appear confusingly. To remove the area, delete only that loop and its associated blocks. Posts can remain sticky on the blog if you want to keep them there.
Choose local featuring without global sticky status
If the post should appear only on a section page, you can place a group of blocks presenting it there. Open the page, create a group with a heading, a short summary and a link to the existing post. Check that the address points to the original. This method suits an infrequently changed selection that should remain under that page editor's control. To undo it, remove the group and keep the post published at its address.
If the selection changes often and the team wants to manage it through posts, a dedicated category or tag can feed a custom loop. Choose a clear name, define its purpose and check whether the site's structure already exposes archives for that category or tag. Add the filter to the relevant page's loop, then assign the term only to the intended posts. The expected result is a list controlled by that term. Removing the term from a post removes it from that selection, subject to the loop's other rules.
Compare the effects of both methods. A manual card provides a chosen position and introductory text, but its summary and image may need updating when the post changes. A tag-driven loop retrieves the post's information, but its order and item count depend on the list settings. If the team wants a single card at the top, set the displayed quantity when the option is available and check the sorting criterion.
In a builder or classic theme, look for a list option that selects a specific post or category. Document the location and chosen rules before changing a global template. If no option is available, an editorial link in the content may meet the need without changing sorting across the entire site.
Check the result and plan when to stop featuring it
Open the blog page as a visitor, then the section page if you created a dedicated area. Check the first post, the order of following items and link destinations. On a phone, confirm that the card remains readable. If the list has pagination, open the second page and observe whether the post or other cards repeat. A sticky item may be handled differently depending on the list. Record the expected behavior in each location.
If several posts are sticky, check their actual order. The native option does not necessarily provide an arbitrary manual ranking among them. For a precise order or a sequence of posts to read, build a manual list of links on the desired page. You can also reduce the number of posts held at the top to leave new posts visible. Check the displayed quantity when a page includes both a featured area and a recent-posts area.
Record the planned removal date in the editorial tracker. When it is time to unstick the post, open the original, then check the blog afterward. If you used a dedicated tag, remove only that tag or the local selection according to the desired result. Check other pages using the same term before deleting it from the category or tag library.
Keep the list address, the rule producing the featured placement and the control post in your record. If a new theme reorganizes the homepage, this information will help distinguish the post's status from the behavior of the new list. The final result must match the scope defined at the start, with a public post at the correct address and a featured placement the team can remove.
Fix a featured placement that lasts too long
Imagine an old announcement remains above a new series even though the announcement's date has not changed. First open the card to confirm the post. Check its sticky setting and the type of list presenting it. If the announcement is sticky on the blog, unstick it. If the card still appears in a separate featured area, inspect that area's rule. It may retain a manual selection or category filter independently of sticky status.
If the old announcement should remain accessible, keep its address and add useful closing information to its content. You can link to the next series, provided the dates and destinations are verified. The team can then feature the new post without rewriting the old publication or changing its date. Check the blog, section page and old announcement's direct address after the transition.
When the card changes only for logged-in accounts, check the same URL while logged out. If the setting is saved and only the public version remains old, ask whether the page is served from a cache. Compare the affected page before purging other parts of the site. Keep the loop name and screenshots of both views so the check remains targeted.
Check the saved state before changing the loop
If administration indicates that the post is sticky but its order remains unexpected, a maintainer can check this state with WP-CLI without modifying posts. Replace 123 with the control post's ID and target the correct site.
An ‘Article épinglé’ response confirms the data used by core; it does not guarantee presence in every list. Return to the loop settings: content type, category, sticky mode, sorting, count and pagination. If the response is negative, check the ID, subsite and saved setting before changing the template.
The native option and Query Loop are free. A sorting plugin is useful only if the request adds a manual order these settings do not provide. For a single local feature, a manual card is often simpler. Keep sticky status and loop configuration separate: undoing one does not restore the other. After correction, check the blog's first page, the targeted list and their pagination.
wp --path="/chemin/recette" --url="https://recette.example" eval 'echo is_sticky(123) ? "Article epingle
" : "Article non epingle
";'
Sources and references
Use these references to check the features, requirements and limitations described. Reading documentation is not a practical test.