

Start by identifying what no longer works
You open your site and see a message reporting a critical error. Sometimes the dashboard will not load either. Your first goal is to regain usable access without losing data. Your second is to understand what caused the failure: a page returning after a change does not yet prove that the problem is fixed.
This guide covers WordPress installed on hosting that you can access. On WordPress.com or a fully managed plan, some file operations are unavailable: use the tools in your account or ask support to perform the corresponding check. You do not need to install another plugin to follow the main procedure. An existing plugin may, however, be the cause you need to isolate.
Copy the exact message, the page address, and the time with your time zone. Then try three addresses: the home page, an already published post, and the administration area. Record which ones respond. If only a product page fails, that detail considerably narrows the investigation. If the browser instead reports an invalid certificate, a DNS failure, or a refused connection, do not immediately start modifying WordPress: the problem may occur before WordPress runs.
Also open a private browsing window. Cached content can hide a failure or make it look as though a fix has not worked. This comparison is a clue, not a remedy. Avoid purging every cache or restarting all updates before recording your observations: doing so would remove useful points of reference.
Choose an approach based on the access you still have
The procedure depends on what you can still open and on the change that preceded the failure. The three approaches below are not three operations you must always perform. Stop when you have identified the cause and the final checks succeed.
If you receive a recovery email, start with approach 1. Without that link, but with a file manager or SFTP access, approach 2 lets you isolate a plugin identified by the logs. If you have just edited functions.php or activated a snippet, see approach 3: it helps you target the correct file or record instead of disabling the entire site.
Without these forms of access, request a targeted intervention through your hosting account. A full restore is a separate fallback: it must preserve recent orders, registrations, and other data. The backup, diagnosis, and verification sections apply to every approach.
Prepare a rollback before touching files
In your hosting account, locate the backups and file manager. Check that you are working on the correct domain rather than another site in the same account. If a recent full backup exists, record its date and contents. A copy of the files does not necessarily include posts, settings, or orders: a full restore also requires the corresponding database.
Preserve the current state before repairing it, even if it is faulty. It may contain orders, comments, or files added since the last healthy backup. Ask the host for a snapshot if the site can no longer produce a normal backup. Blindly restoring yesterday’s backup may bring the site online while deleting this morning’s sales. For an active store or membership site, ask exactly how those records will be preserved.
For any file you intend to modify, download a copy into a local folder named with the date and site name. Do not leave a configuration file named wp-config.php.bak in a publicly accessible directory: depending on the server, it could be downloaded. Also record folder names before and after renaming them. This prevents you from having to guess their original state during troubleshooting.
If you have a test copy, start there. Nevertheless, check that its PHP version and components are comparable to production. A failure that does not occur on the copy may be explained by that difference. Disable payments, emails, and external integrations on the copy as soon as it is created, before the first visit: a duplicated site can still call real services. Without a test environment, favor one targeted fix at a quiet time, with a way to roll it back immediately.
Approach 1: use the WordPress recovery link
The recovery email can make the administration area accessible when a fatal PHP error affects a plugin or theme. Check the administrator’s inbox and spam folder. Not every failure sends this message: an error occurring very early or in a background process may fall outside this procedure. WordPress core does not support this recovery mechanism on multisite; contact the network administrator for files and logs.
The pause applies to your recovery session. It does not ensure that visitors can access the site again. Subsequently deactivating a plugin from the plugin list, however, changes the live site. Preserve its data and account for any temporarily missing features. If the error concerns the theme or an added snippet, use approach 3 before changing its state.
- Check the domain in the link you received, open it, and sign in with your usual account. Keep the link private.
- In the recovery warning, record the component, message, and reported line.
- For an identified plugin, open Plugins → Installed Plugins, record its version, and select Deactivate for that plugin alone, never Delete.
- Open a public page in a private browsing window. If it returns, look for a fix; do not immediately reactivate the same faulty code.
- After fixing the problem, click Exit Recovery Mode in the administration toolbar, then check the site again outside that session.
- If the link no longer works, use a new email that was actually sent or move on to file access. Do not construct a recovery URL from an example.
Find the error that matches your test in the logs
An error log is a list of timestamped technical messages. In the hosting panel, look for a section named Logs or PHP Errors. Its location depends on the provider. Open the failing page once, note the time, then inspect the new lines. If the log uses UTC and your clock uses another time zone, convert the time: an error from yesterday does not necessarily explain your test.
First look for fatal messages, uncaught exceptions, or syntax errors. Warnings and notices can be useful, but their presence does not prove that they prevent the page from loading. A fictional example such as Uncaught Error followed by a path under wp-content/plugins/exemple/ points toward a plugin. The folder name provides a lead; it does not, by itself, prove which component is responsible for the conflict.
The last function named may have received invalid data from somewhere else. Read the beginning of the message and the associated lines rather than trying to fix every file mentioned. For a store, specify the action that triggers the error: viewing a product, modifying a cart, or opening an order. This observation is often more useful than a long log excerpt without context.
If you share an excerpt with support, remove passwords, tokens, personal addresses, and private request parameters. Keep the error type, component names, and time. Never share the full contents of wp-config.php. The host can usually identify your installation from the domain and customer account without receiving its secrets in a public ticket.
Enable a temporary log only if you need one
Use the host’s private PHP log first. If that log is insufficient, the constants below allow temporary logging by WordPress. They cannot capture a failure that occurs before WordPress initializes. Hiding errors on screen does not protect a public log file, so the example uses an explicit private path.
Have the host confirm an existing folder that the PHP process can write to and that lies outside every public root in the account. Replace /home/COMPTE/private-logs/wp-errors.log; do not copy that path literally. If your plan does not allow this storage, stick to the host’s built-in log. Do not grant everyone access in order to create the file.
The constants belong before WordPress is loaded in wp-config.php, normally before require_once ABSPATH . 'wp-settings.php';. The Boolean values true and false have no quotation marks. The expected result is a timestamped error matching a page request, without displaying details to visitors.
- Download
wp-config.phpinto a private local folder. Record the existing values ofWP_DEBUG,WP_DEBUG_LOG, andWP_DEBUG_DISPLAY. - Edit each existing definition or add only a missing one. Adapt the private path; do not add duplicate definitions or another
<?phptag. - Save, visit one public page that produces the error, then read the log over SFTP or in the panel. Do not repeat a payment, email, or import just to obtain a trace.
- If nothing is written, have the path, owner, permissions, and server log checked. An empty log does not prove that no PHP error occurred.
- After collecting the information, restore the previous settings while keeping public error display disabled. Remove only the temporary lines and retain the useful excerpt privately.
- If editing the configuration causes a new failure, undo only your changes. Restore the entire file only if nobody has modified it in the meantime.
// Adapter ce chemin à un emplacement privé confirmé par l’hébergeur.
define( 'WP_DEBUG', true );
define( 'WP_DEBUG_LOG', '/home/COMPTE/private-logs/wp-errors.log' );
define( 'WP_DEBUG_DISPLAY', false );
@ini_set( 'display_errors', 0 );
Approach 2: isolate the plugin through its files
If the administration area remains accessible, start with the plugin corresponding to the log clues or to the change immediately before the failure. Deactivate it, then repeat the initial page visits. Do not resubmit an order, payment, or import that has already started without checking its outcome. To reproduce a sensitive action, use a copy with external effects disabled. Compare the affected page with an ordinary post. A page loading without its form does not mean that the form works again.
Without access to the administration area, use the host’s file manager or SFTP. Targeted renaming prevents an ordinary plugin from loading from its usual location; it also affects visitors. It does not uninstall the plugin’s data. On a network, involve the network administrator before changing a shared folder.
Without a specific suspect, testing with all plugins disabled is more reliable on a copy of the site. In production, it may remove payments, forms, security rules, or content. Do not mechanically disable everything on an open store. Must-use plugins, some cache components, and code loaded by the host do not necessarily stop alongside ordinary plugins: if the failure continues, do not conclude too quickly that no plugin can be involved.
- Identify the correct domain and the installation containing
wp-admin,wp-includes, andwp-content. Open the actual plugins folder, usuallywp-content/plugins. - Record the suspect folder’s name, then rename only that folder, for example from
exemple-formulairetoexemple-formulaire.pause. Retain all of its files. - Visit the public page and administration area. If nothing changes, restore the original name and return to the log instead of blindly disabling more components.
- If access returns, open Plugins → Installed Plugins while the temporary name is still in place: WordPress can then detect the missing file and record its deactivation.
- Restore the original name, then confirm in that list that the plugin remains inactive. Restoring the name before WordPress records the missing file may load the plugin again and bring the failure back.
- Only reactivate a component confirmed as the cause after fixing it on a copy. To undo an inconclusive test, restore its name and previous state once the administration area is available.
Approach 3: find where the added code is actually stored
Did the failure occur immediately after a code change? Record where you saved the change: a theme file, a snippet plugin’s editor, or another component. These locations require different repairs. A snippet entered in a plugin is not necessarily stored in functions.php. Do not search for it by modifying every file with that name.
Using the file manager or SFTP, open the installation you already identified. The paths wp-content/themes/nom-enfant/functions.php and wp-content/themes/nom-parent/functions.php are examples to adapt to the actual folders. Cross-check the log’s path, the recent change, and, if accessible, the active theme under Appearance → Themes. A theme that is installed but inactive is not the first file to fix.
When a child theme is active, its functions.php loads before the parent’s file; it does not replace it. Copying the parent’s entire file into the child can therefore cause duplicate function declarations. An error naming an already declared function should not be addressed by arbitrarily deleting a function from the parent. If the trace points to a file included by functions.php, also check the file that was actually modified.
Record the WordPress, theme, and PHP versions before making a correction. A syntax error may identify a line close to the mistake; it is not an instruction to delete that line. If you cannot confidently identify the change, have the person maintaining the site compare the files.
Restore only the theme file that was changed
First download the current version of the target file into a private local folder, even if it is faulty. Then locate its healthy copy from before the addition. Check that it belongs to the same theme and version. If other useful changes have been made since that copy, have the two versions compared before using it.
In a child theme, restore only its modified file, or have the precisely identified block reverted in a local copy. Do not empty all of functions.php: it may contain other necessary customizations. Do not replace it with the parent’s file. If you cannot identify the boundaries of the block, return to a known copy or ask for help rather than improvising PHP comments.
If the addition was made directly in the parent theme, target that theme’s own functions.php. A file from the official archive of the same version can be used for comparison, but replacing it would also overwrite earlier customizations in that file. Preserve them offline and arrange a limited correction. Updating or reinstalling the entire theme is not the first response to this recent addition.
Upload the prepared file to the exact path and verify that the transfer finishes. Check the home page, administration area, and affected feature, then the new log entries. If another error appears, do not pile on more changes: restore the file saved immediately before this intervention to undo the last change, then request help comparing the versions. This rollback may restore the original failure; it is not the final healthy version.
Deactivate the correct snippet in an existing plugin
If the administration area opens, go to the plugin where you entered the snippet and open its snippet list. Record the title, identifier, and scope of the latest addition. Keep a private copy of its contents and settings, then deactivate that snippet without deleting it. Check the workflow that was failing. Do not edit a line in the plugin’s engine simply because the trace mentions the snippet being executed.
The rescue addresses below assume WordPress is installed at the domain root. If your normal administration area is in a subdirectory, retain that prefix before /wp-admin/.
A plugin-specific safe mode can help, but it is not WordPress’s native recovery mode. For an existing Code Snippets installation, open /wp-admin/admin.php?page=snippets&snippets-safe-mode=1 on your own domain. This per-page safe mode requires an administrator session that is already signed in; it does not bypass login.
For an existing WPCode installation, the corresponding path is /wp-admin/?wpcode-safe-mode=1, restricted to authorized signed-in users. This parameter-based safe mode suspends auto-inserted snippets for the authorized user without changing their execution for visitors. Deactivate the faulty snippet, then reopen the address without the parameter for Code Snippets, or use Exit Safe Mode in WPCode. That button opens a new tab without safe mode; the previous tab remains in safe mode. Also check the site as a signed-out visitor.
If login is blocked but you can access the files, both publishers provide a global safe mode in wp-config.php: define( 'CODE_SNIPPETS_SAFE_MODE', true ); for Code Snippets, or define( 'WPCODE_SAFE_MODE', true ); for WPCode. Use only the constant for the plugin that is actually installed, after checking its documentation and version. These are not native WordPress settings.
Back up this file outside the public directory. Look for an existing definition of the constant: do not duplicate it. Add or adjust the definition before WordPress loads, as with the diagnostic settings shown above. This safe mode globally suspends the relevant snippets, not just the failing one. Account for temporarily missing features and involve the network administrator on multisite. Sign in, deactivate only the faulty snippet, then remove only your temporary addition or restore the original value. Check again outside safe mode. If the configuration change fails, restore its copy and request a targeted intervention; do not reinstall the plugin or purge its data.
Only reactivate a snippet after fixing and verifying it on a copy. If it still fails, leave it inactive and pass on the clues. Without access to either files or administration, ask the host for this targeted intervention without sharing a password or public recovery link.
Change themes only as a separate test
If the modified file has been restored but the cause remains uncertain, preferably use a copy to test a compatible official theme that is already installed, through Appearance → Themes. Record the active theme and take reference screenshots: menus, templates, widgets, and presentation may change. The expected outcome is to establish whether the failure depends on the theme, not to automatically keep the test theme.
If the error disappears, compare the parent and child versions before returning to the corrected theme. If it persists, restore the original theme on the copy and continue diagnosing. When the administration area is inaccessible, have the host check the fallback theme rather than blindly renaming the active theme.
Do not modify WordPress core to hide the error. After recovery, arrange customizations according to the role intended by the theme or component, with a backup before every change. Creating a child theme in a hurry or moving an uncorrected snippet does not fix the mistake.
Distinguish PHP incompatibility, insufficient memory, and incomplete files
An error that appears immediately after a PHP version change deserves a specific check. Record the old version, the new version, and the requirements of the affected components. A newer version may expose an existing incompatibility; staying indefinitely on an obsolete version is not a repair. On a copy, test component updates and ask the provider which maintained version suits the whole installation.
A message saying that allowed memory has been exhausted does not automatically justify raising limits to their maximum. Record the affected action and reported quantity. A large import, image generation, and a faulty loop do not require the same treatment. Start by reducing the size of the operation where possible, then check the actual limits with the host. A value added in WordPress cannot necessarily exceed the server limit.
If an update was interrupted, a plugin’s files or core files may be incomplete. Check available space, operation messages, and displayed versions. Do not overlap several update attempts. Replacing files with clean copies must follow the component’s official procedure while retaining data and customizations. For core, do not blindly replace wp-content or the configuration file.
Finally, a read or write error may result from file permissions or ownership. Do not apply 777 across the site as an experiment: it dangerously broadens write access and does not fix incorrect ownership. Have the host correct the specific path and process identity, then verify only the operation that was failing.
An option after recovery: isolate a conflict with Troubleshooting
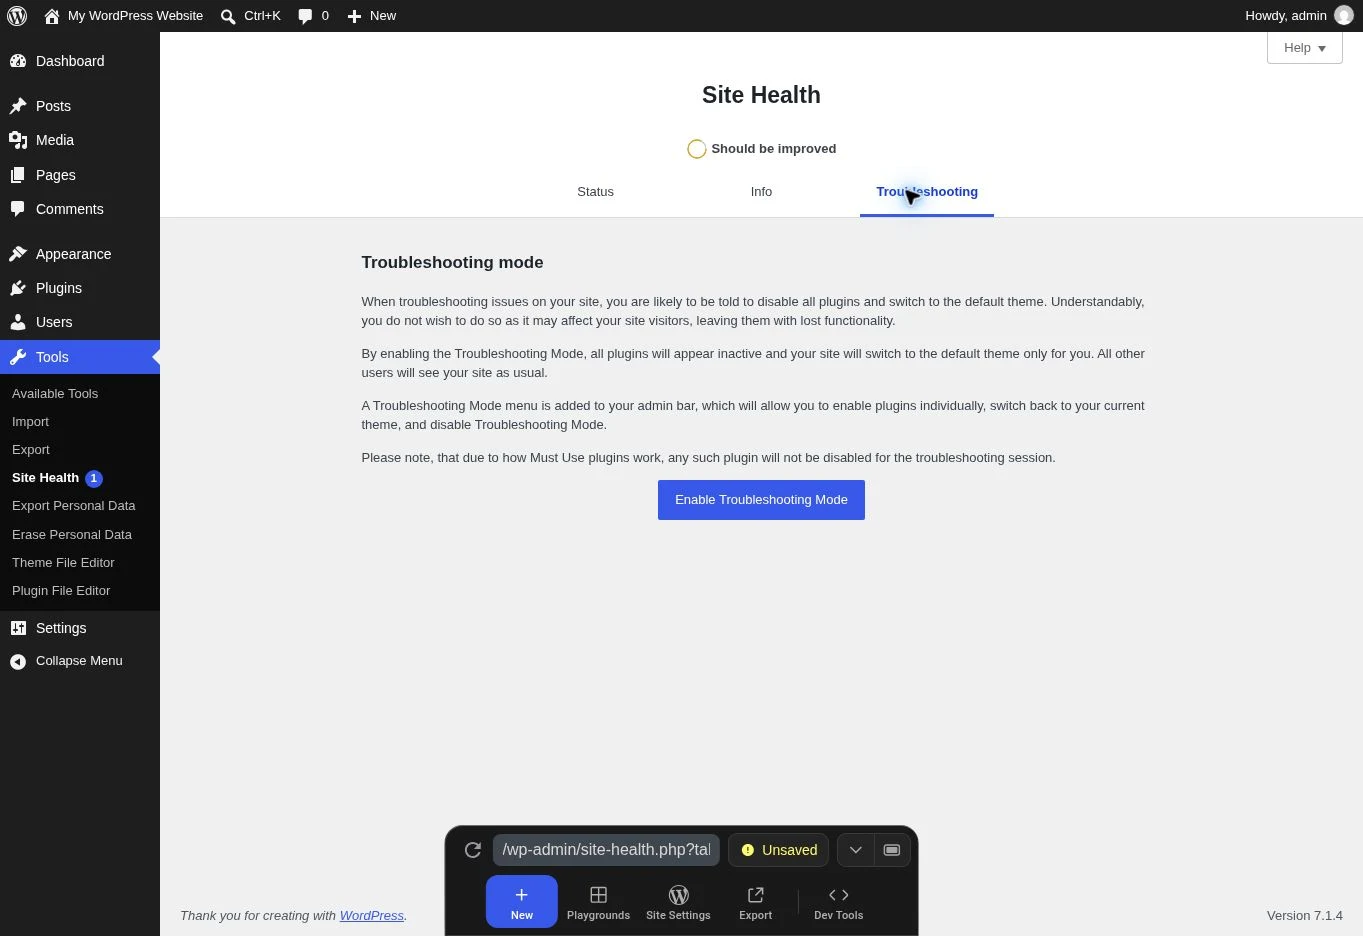
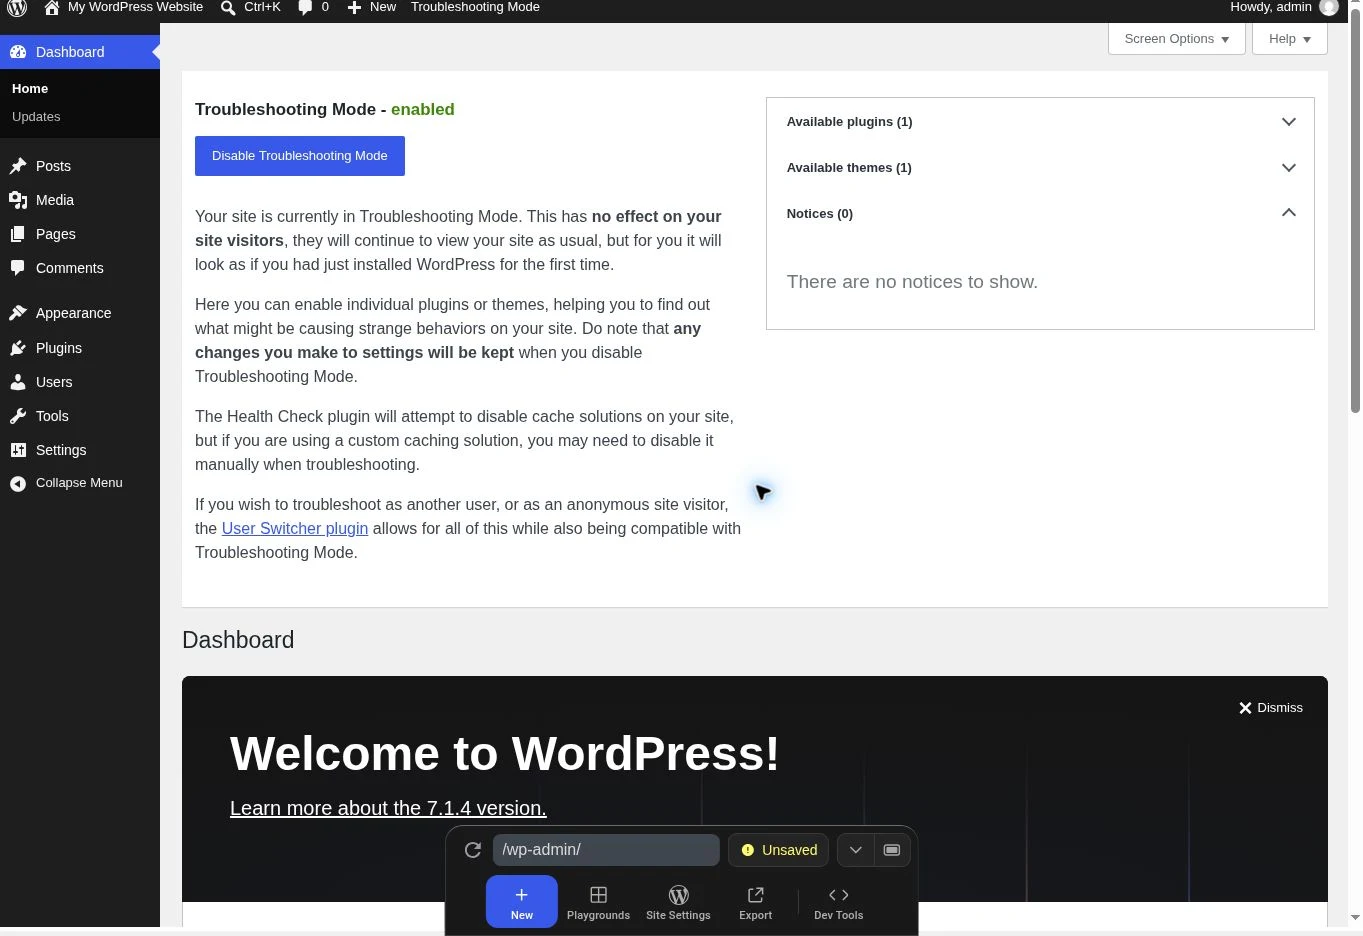
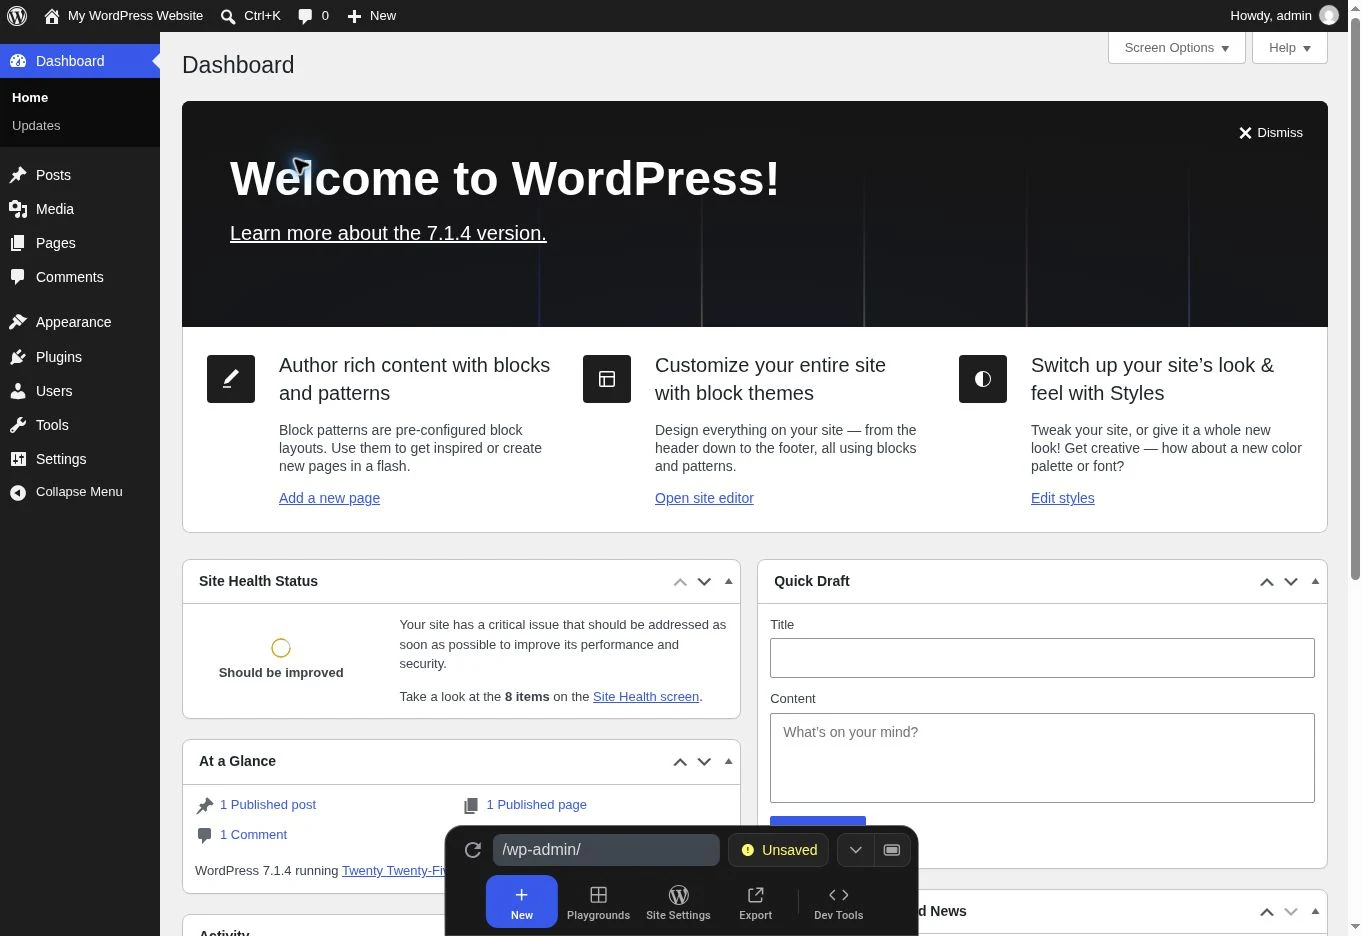
The screenshots below show a separate demonstration installation. They were taken on November 13, 2026, with WordPress 7.1.4, PHP 8.3.36, and Troubleshooting 1.0.2. Access to the tab, activation of the mode, and exiting it were checked. This check does not reproduce a fatal error and does not validate the isolation of every cache or an online store.
To navigate an English interface from French instructions: Tools corresponds to Outils, Site Health to Santé du site, Enable to Activer, and Disable to Désactiver. After activation, the “Troubleshooting Mode - enabled” panel and the menu in the top toolbar should appear. A changed appearance without this confirmation is not proof that you are in the intended mode.
If administration works again but the responsible component remains uncertain, Troubleshooting can isolate a conflict in your session. This free plugin by Marius L. J. is optional; check its requirements on the official listing. It cannot repair an inaccessible server and is not a copy of the database.
Prefer staging. Must-use plugins remain loaded, some caches interfere with isolation, and writes remain real. Limit the test to displaying a page: do not create an order or submission. Any repair must then be checked outside troubleshooting mode.
- With the necessary permissions, install and activate Troubleshooting through Plugins → Add Plugin, checking the author and the
troubleshootingslug. - Open Tools → Site Health → Troubleshooting, then Enable Troubleshooting Mode.
- Visit the page, restore your theme, then enable plugins one at a time through the mode’s controls. Record whether the fault returns after a single change.
- Select Disable Troubleshooting Mode in the administration toolbar or dashboard. If the screen becomes unresponsive, delete cookies for that domain and sign in again.
- Compare as a visitor, purge only the relevant cache if necessary, and deactivate this temporary tool after the test. Retain the original configuration of components that were not responsible.
Verify the repair and prepare a useful support request
Return to your initial list: the home page, a post, administration, and the action that triggered the error. Also test as a signed-out visitor. For a store, use a secured copy and the intended test mode for the cart and checkout, with no real payment or unintended email. For a form, prepare an authorized test recipient and disable real integrations. A visually correct response does not prove that features removed during troubleshooting have been restored.
Inspect the new log lines after these tests. The goal is not a perfectly empty log, but confirmation that the fatal error associated with the failure no longer returns. Confirm that temporary debugging is disabled and that each folder has a documented name. Also exit recovery or safe mode: a session that ignores faulty code does not validate the repair for visitors. Record the correction, retained versions, and date. This short record will help if the failure returns after a future update.
If you need help, provide a brief case: the domain, time of the latest test, affected page, exact message, recent changes, known versions, and operations already performed. State whether you have a restorable backup and a test copy. Request a targeted response, such as checking the PHP log at that time, rather than a general reinstallation. This will help avoid repeating tests that changed nothing.
If no cause is identified, stop making successive changes and return to the most stable documented state. Assisted intervention is better than an accumulation of contradictory changes. The repair is complete when the site works, the necessary features are present, and you know which cause was addressed—not simply when the error message disappears once.
Check a PHP correction before uploading it
If the log reports a syntax error in a custom file, a local check helps avoid causing a second failure when you upload it. Download the file into a private folder, work on its copy, and use a PHP version matching the site’s. The command below parses the file without running its code: replace the path with that of your copy, never a file downloaded from an unknown source.
A response reporting no syntax errors only allows you to proceed to further tests. It guarantees neither the availability of WordPress functions nor component compatibility. For example, a statement calling a nonexistent function can be syntactically correct and cause an error when loaded. If parsing reports a fault near a brace, also inspect the previous line: a missing semicolon or quotation mark may be the cause.
Then upload only the corrected file to the test copy. Check the page that triggered the error, then the log. An existing snippet management plugin remains another way to deactivate a snippet; this file check does not replace the plugin’s own safe-mode mechanism.
php -l "/chemin/prive/functions-corrige.php"Sources and references
Use these references to check the features, requirements and limitations described. Reading documentation is not a practical test.
View 20 references
- WordPress: how recovery mode works ↗
- WordPress: common errors ↗
- WordPress: enabling and disabling debugging ↗
- WordPress: troubleshooting without access to administration ↗
- WordPress: backing up files and the database ↗
- WordPress: managing plugins ↗
- WordPress: file permission principles ↗
- WordPress: updates and recovery after a failure ↗
- WordPress: the role and loading of functions.php ↗
- WordPress: child and parent theme functions.php files ↗
- Code Snippets: global and per-page safe modes ↗
- WPCode: error handling and safe modes ↗
- WordPress: administration and plugin scope in multisite ↗
- WooCommerce: disabling the effects of test orders ↗
- WordPress: administration address for a subdirectory installation ↗
- WordPress: the fatal error handler’s scope and multisite ↗
- WordPress: validating active plugins ↗
- WordPress: loading existing plugin files ↗
- Troubleshooting: features, requirements, and exiting the mode ↗
- PHP: syntax checking with -l ↗