

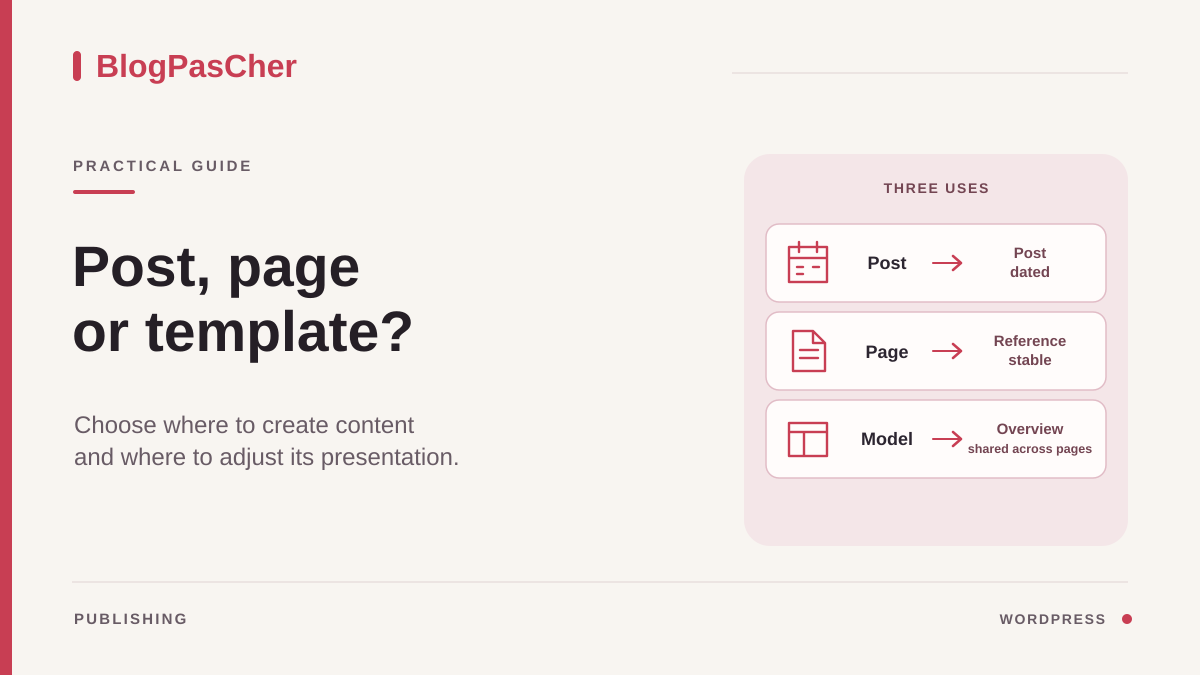
Choose according to how readers should find the content
Before creating the content, write one sentence describing its purpose. “Visitors need to find the opening hours all year round” suggests creating a page. “Subscribers need to discover this month's report in the blog” suggests creating a post. “Every entry should present its title and image in the same order” suggests examining the template. A single project may combine these three needs without all three being handled in the same place.
To decide between two choices, ask where the reader should arrive. A reference URL linked from the menu suits a page, such as Contact, Services, or Visiting Information. Content found by date, topic, or feed often suits a post. A template defines the presentation of this content or of a list. Creating a template does not, by itself, produce a document to link in the menu. You need to create or choose the content that will use it.
Imagine an association. Its contact details stay on a page. A dated announcement about the next meeting becomes a post. The shared presentation of all announcements belongs to the post template or the relevant list template. If the Contact page needs a special banner, first determine whether that banner is unique to it or intended for several pages.
Record the working title, intended access path, and the role of the person who can approve it. This brief preparation also helps identify content that already exists. If a page already serves the same purpose, editing its text may preserve links that use it and avoid two competing destinations.
Create a page for reference content
Open Pages > Add New Page or Add New, depending on the dashboard wording. Enter a title that describes the destination. Add text, images, and links in the content area, then save the draft. Open the preview to check that the page presents information in the order readers need it. A contact page may start with the main contact details and place directions afterward.
Under Settings > Page, examine the displayed status, URL, and template. After saving for the first time, check the URL segment if your configuration offers it. If the page belongs in a hierarchy, choose a parent page when the panel allows it. Check the resulting URL and decide how visitors will find the child page. The page hierarchy and the visible menu are two elements to check separately.
Once the content is approved, publish according to the site's process or submit it for review if your permissions require it. Open the public URL in a visitor session. Check the title and actions, then add a link from the menu or another page if that is the chosen route. A published page may be directly accessible even if the menu does not lead to it yet.
With the classic editor, make the same choice in the Pages menu. The template, URL, and parent panels may look different. If the site uses a page builder, create the correct content type in the administration area, then open that document with the intended editor. Check its status and URL in WordPress before adding it to navigation.
Create a post for a series or topic
Open Posts > Add New Post. Write the title and content in the document, then save a draft. Under Settings > Post, check the category, featured image, and excerpt where these features are available. For a report, choose a category already used by the other reports. It can help readers find them in an archive or filtered list. Creating an almost identical category may scatter posts between two destinations.
The title and excerpt should make the card understandable in the blog. Add a featured image if the list uses one and check the individual content preview. The card and post may present the same image differently. For a post whose date matters, also check the intended date and publication status. A draft or a post scheduled for later may still be absent from the public list when you check.
After publishing, open the post directly by its URL, then from the blog or expected category. If the URL works but the card is missing, examine the category, pagination, and list filters. Some grids display only the latest items or posts from a specific group. The content's public availability and its inclusion in a list depend on separate settings.
If the post also needs to be accessible from a permanent page, add a link from that page to its destination. For several announcements, a filtered Query Loop can display a selection automatically. Check the selection using a post that should appear and another that should remain outside it. This avoids copying the same text again whenever the series changes.
Use a template for the presentation framework
With a block theme and site editing permissions, open Appearance > Editor > Templates. Select the template actually used by your example. For a post, check the single-post template. For a list, find the blog or corresponding archive template. The name shown in the document settings may help for an ordinary page or post. Check the preview and context before editing.
In the template's List View, identify blocks that use the document's data, such as Post Title and Post Content. Text specific to each document stays in its page or post. A paragraph written directly in a template appears on documents that use it, which may suit a shared notice. For a different introduction on every page, write it in each page's content.
If only one page needs a special layout, check whether you can assign a custom template under Settings > Page > Template. A custom template must contain the content block if the page is to display its text. Record the initial assignment, preview the page with the chosen template, and check another page using the ordinary template. Editing a shared template and changing a single document's assignment have different scopes.
With a classic theme, available templates may be selected in the page settings and their structure may be maintained in the theme. The absence of Appearance > Editor may therefore reflect the theme type or account permissions. Ask the person responsible to identify the active template if you cannot examine this level.
Organize a homepage and a post list
If the project calls for an introductory homepage and a separate list, prepare two distinct pages. Open Settings > Reading with the necessary permissions. Record the current configuration, then choose a static page display when that is the desired behavior. Assign one page as the homepage and the other as the posts page. On a live site, check this homepage change on a copy before saving it on the public site. Then check the site root and the blog URL. If the list appears at the correct URL but the homepage omits the selected page's content, examine the homepage template and whether it contains the Post Content block.
The page assigned to posts provides the blog index URL. In native behavior, WordPress displays the index using its list template and ignores that page's body and individual template. To add an introduction to the blog, edit the index template. This index remains accessible to visitors even if the assigned page has a password. Check post visibility if the list needs to remain private. For a page with freely arranged content and a selection of posts, prepare an ordinary page containing the introduction and an appropriate loop.
Choose between these approaches according to the expected result. A native index suits a chronological blog. An ordinary page with a filtered list may suit a topic collection accompanied by introductory text, other links, and several sections. Check the loop's selection and avoid changing Reading settings for a list that should appear only on this page.
After an assignment, also test the menu's Home and Blog links. If the URL or destination changed, review the links already used on the site. Keep the initial Reading values so you can restore the previous behavior if something goes wrong.
Link the content in the right place in navigation
After validating the URL, decide whether the document belongs in the main navigation, a contextual link, or a list. For a Services page, the main menu may be the expected route. For a report, the post list or an archive may be enough. A template does not need a menu entry to style the documents to which it applies. The link should lead to the public destination the reader needs to open.
In a block theme, open Appearance > Editor and access the navigation used by the header. Select the Navigation block and the relevant menu. If the menu uses individual links, add the page link or chosen destination and check its label. An automatic page list may include a newly published page. Observe the menu before adding a second link to the same page.
With a classic theme, examine Appearance > Menus or the panel provided by the theme. Check the menu location before saving. The main menu and footer may display different sets of links. With limited permissions, ask the person responsible for the menu to use the verified URL and agreed label. Different people may approve the document and its navigation.
Check the destination from the public homepage and on a phone. Open the mobile menu, select the link, and compare the resulting title with the one you expected. If a parent page or menu changed, also try the route to a neighboring page. The expected result is a destination accessible through the intended path.
Correct an initial choice without losing a useful URL
If the document is still a draft and was created with the wrong type, create the desired type, transfer the content, and check the settings specific to the new document. When moving from a page to a post, check the category, date, excerpt, and featured image in particular. In the other direction, check the parent, template, and navigation. Keep the first draft until the second contains all necessary information.
If the content is already published, record its URL and incoming links before replacing it. The new document may have a different URL. Ask the person responsible how to preserve existing access, for example with a redirect when the URL must change. Test the old destination and the new one in a visitor session. Keep a single reference document at the end of the migration and update the menu pointing to it.
To undo a template assignment change, reassign the template recorded before the test, then compare the preview. If you edited a shared template, restore the changed part or use the history available for that template after checking its scope. Restoring a page revision can help with that page's text. The menu and Reading settings need to be restored in their own screens if they changed.
To remove a menu link, delete the relevant navigation item and check the public menu. Decide separately whether the document should remain accessible by its URL. If the homepage or blog was assigned incorrectly, restore the choice recorded under Settings > Reading and test both destinations. Each rollback thus targets the setting that produced the effect.
Apply the three choices to a small site
A workshop wants to present its courses, publish a monthly report, and give those reports a consistent appearance. Create a Courses page for details that remain valid for several months. Link to it from the menu. Create each report as a post and give these posts a shared category. Open a report on its individual page and also find it through the blog or category. You now have a reference destination and a chronological path.
If all reports should display their image below the title, first examine the individual template. If this change should affect every post, check the shared template. If only reports should use this layout, examine the custom templates the site allows you to assign. Then check one report and another post. If the request concerns the image in the report grid, open the list structure and inspect its cards.
Before finishing, check three links. From the menu, reach Courses. From the list, open the latest report. From a report, return to the series through the link provided on the site. If a route fails, correct the menu, classification, or list according to the exact location. If the destination opens but presents the content poorly, return to the template or the affected document's layout.
Three questions to avoid editing the wrong object
Before clicking Add New, answer these three questions:
A free exercise is to prepare two drafts with different titles and paragraphs, then assign the same template to both. The preview should show the shared framework and the two distinct texts. If the same paragraph appears everywhere, check that it was not written in the template in place of the content block.
Do not perform this exercise on the page designated as the posts page: WordPress uses that assignment for the index and ignores its ordinary body. For a freely arranged introduction accompanied by a selection of posts, use an ordinary page with a Query Loop. Keep the initial Reading assignments so you can undo a test.
- Does the text need its own reference URL? For Contact or Opening Hours, create a page, then link that URL in navigation.
- Does the text belong to a dated series? For a monthly report, create a post and check its category and appearance in the list.
- Should the same layout repeat with different texts? Edit the template and keep the Post Content block where each document should insert its text.
Sources and references
Use these references to check the features, requirements and limitations described. Reading documentation is not a practical test.