

Understand why one change affects multiple pages
You intended to change one page’s header and find the same change elsewhere. With a block theme, the header is often a shared template part. Several templates may use this same part, and several pages may use each of those templates. Editing the common header’s text or structure then affects every page that reuses it.
The desired result is either to undo the accidental change or to create a variant limited to the correct pages. These are two separate operations. Start by retaining the current state and identifying what changed. Duplicating only the page does not necessarily detach its template or header.
This guide’s main procedures concern a block theme with Appearance → Editor and an account authorized to edit templates. On WordPress.com, first select the relevant site. For a classic theme or builder, scope settings may be elsewhere; do not transpose the native workflow to a screen that does not provide it.
- Record the page that should change and one that should remain identical.
- Keep their addresses and, if possible, a before/after screenshot.
- Record the modified element: text, layout, logo, menu links or color.
- Stop further changes while identifying the shared object.
Identify the relevant page, template and header
Open the target page in Pages → All Pages. In Settings → Page, record the template name. This name identifies its display structure; it is not the page title. Opening Edit template switches to a reusable object, even if you arrived from a single page.
In the template editor, open List View and select the header. Identify the template part and its name. Also record the blocks it contains: Navigation, Site Logo or Site Title may share other data beyond this structure. Then compare the reference page’s template.
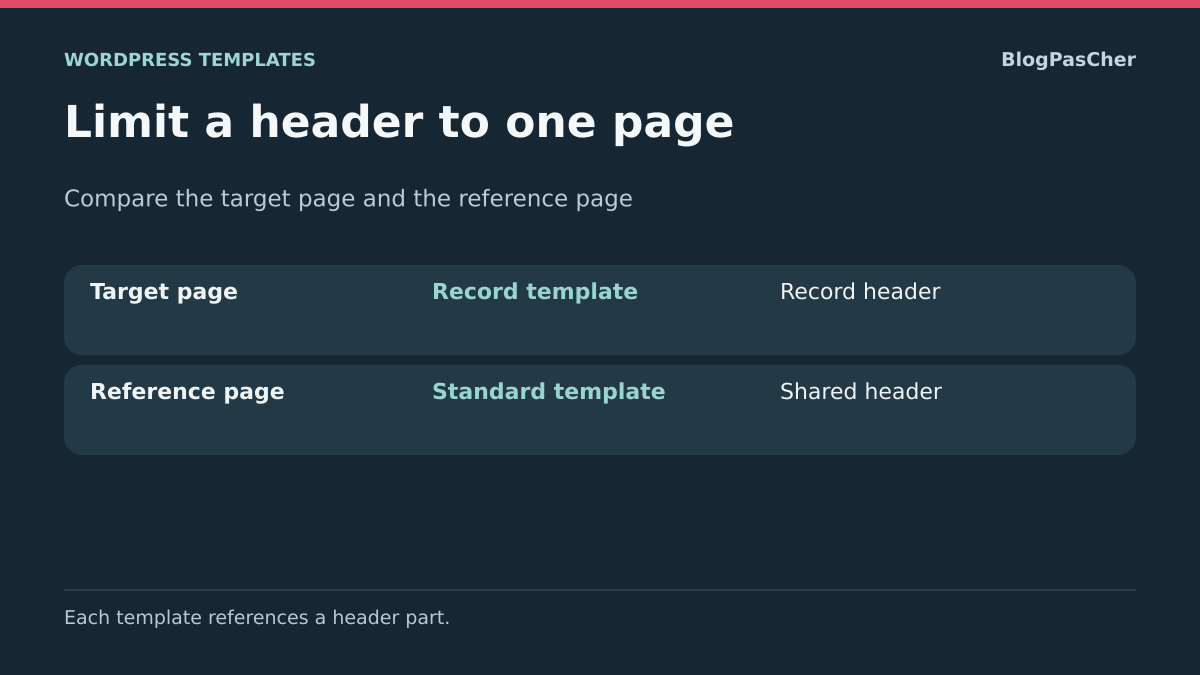
The expected result is a clear chain: target page → template used → header part. If both pages use the same template, changing its structure affects both. If their templates differ but reference the same header, sharing occurs at this second level. This inspection requires no saving.
- Record the template assigned to the target page.
- Open it through its Edit template option.
- In List View, select the header and record its name.
- Repeat the inspection for the reference page.
- Leave without saving and compare both chains before choosing a fix.
Approach 1: undo a small accidental global change
If the change is still open and unsaved, use Undo in the editor or leave without saving these changes. Then check the preview before resuming. Do not approve a summary announcing a shared header change when you intended to work on only one page.
For an already saved change whose initial state you know exactly, correct only that element. For example, if you added a sentence to the wrong header, open that common part and remove only the added paragraph. The expected result is restoration of the common header on the relevant pages. This restoration is also global, which is intended in this approach.
Before correcting, keep a copy of the added text and current values so you can return to this state if necessary. If you no longer know the expected version, do not randomly reset all customizations: use a known version or verified backup to prepare a targeted restoration.
- Open Appearance → Editor and find the inspected template.
- In List View, select the shared header, then Edit original if that command is offered.
- Remove only the paragraph added by mistake, or restore the precisely recorded initial value.
- Save, checking the changed object in the summary.
- Check the target page and reference page in a logged-out session.
Restore a revision only for the correct object
A template revision can help if you changed the template’s structure itself. In Appearance → Editor → Templates, the template’s three-dot menu offers View revisions when that feature and a history are available. Compare the version before restoring it; it may contain changes other than the header change.
Do not confuse this approach with restoring an independent header part. Restoring an old template version may restore its reference to the header without restoring that shared part’s old content. Identify the object in which the change was actually saved.
The expected result is targeted restoration of a known structure, followed by checks of the pages using it. Retain the current state before this operation. Rollback consists of reapplying the retained version if comparison reveals another effect.
- Open Appearance → Editor → Templates.
- In the identified template’s menu, choose View revisions if the option exists.
- Compare the current version with the one preceding the change.
- Restore only a version whose other differences are acceptable, then save.
- Check two pages using this template.
- If the header remains changed, reexamine the shared part instead of restoring other templates in succession.
Approach 2: prepare a separate template for the target page
To limit a variant to one page, you need a template not already assigned to other pages. Work first on a backed-up copy. The example adds a special welcome sentence in a header dedicated to the Contact page. The suggested names are examples; choose explicit labels for your site.
The template copy still retains references to shared parts. Therefore, do not immediately edit the copied header. This first stage produces only a new saved template with the usual structural content. You will then replace its header reference.
- On the copy, open Appearance → Editor → Templates and the template currently used by the page.
- In the editor’s Options menu, choose Copy all blocks.
- Return to Templates, click Add template and choose Custom template.
- Give it a name such as Contact Page — dedicated header, then create it.
- If a pattern selection appears, skip this step to obtain an empty space.
- Paste the copied blocks into this new template.
- Check that the Content block is present and save only this new template.
- Keep the original template intact; no page change is necessary yet.
Create a truly separate header part
Now create a new template part; merely renaming the original header would not make it independent. In Appearance → Editor → Patterns, open the template parts. The Add pattern button lets you choose Add template part. Select the Header area and give it a distinct name, such as Contact Header.
For the first test, add a Paragraph block containing a nonconfidential reference sentence. You can then build its layout with the necessary blocks. Starting with a simple change lets you verify scope before reproducing complex navigation.
The expected result is a newly saved part without changes to the common header. It does not automatically appear on the Contact page: you still need to select it in the new template. To cancel its preparation, leave it unused; do not delete the original header.
- Open Appearance → Editor → Patterns and the template parts.
- Click Add pattern → Add template part.
- Enter a distinct name and choose the Header area.
- Confirm creation.
- Add the reference paragraph and save.
- Check that the saved name belongs to the new part, then return to the new template.
Replace the header reference in the new template
Return to the Contact Page — dedicated header template, not the original template. In its List View, select the existing header. Its options menu lets you replace it with another available part. Choose Contact Header. This selection changes the reference in this template; it must not change the common header’s content.
The expected result is the reference paragraph in the new template, with its distinct header name. Keep the Content block, which displays each page’s own text, and the other useful elements of the copied template. A correct header does not compensate for that block disappearing.
To roll back at this stage, replace the new part with the one recorded initially. You are still working on the copy. The original template does not need saving again.
- Open the new template and confirm its name at the top of the screen.
- In List View, select the existing header part.
- Open its three-dot menu, then Replace.
- Choose the new Contact Header part.
- Check its name and the reference paragraph.
- Also check the Content block and footer.
- Save only the new template and any new objects actually expected.
Assign the variant to a single page and test it
The custom template must now be assigned to the target page. In Pages → All Pages, open Contact. In Settings → Page, click the template name, choose Change template and select the created variant. Save this page. Do not assign it to other pages in bulk for the first check.
The expected result is the reference paragraph only in Contact’s header. The reference page must retain the usual header. If both still change, recheck both template and part names: duplication may not have been followed by the expected replacement.
This procedure targets an ordinary page. The homepage, posts page or an archive may use a more specific automatic template. If the selection has no effect on one of these destinations, first check the template actually used; do not change several templates at random.
- Record Contact’s initial template.
- In its settings, choose Change template, then the variant.
- Save the page.
- Open Contact in a logged-out session and look for the reference paragraph.
- Open the control page and check its absence.
- To undo, reassign Contact’s initial template and save; keep the variant unused during the check.
Keep menus and identity data separate
A new header part does not make all its blocks independent. Site Title represents the global site name; changing it in a header can change that identity elsewhere. For a page-specific sentence, use a Paragraph or ordinary Heading. Similarly, a special local image can be an Image block instead of a global logo replacement.
Navigation may continue displaying a shared menu. If the variant needs different links, create a separate menu before editing them. To undo, reselect the recorded initial menu without deleting it. The expected result is retention of the old menu on the reference page.
- In the new header, select the Navigation block.
- Record the selected menu’s name.
- In the menu options near its name, choose Create new menu if different links are needed.
- Add the desired links with the block’s add button, then save.
- Check navigation on the target and reference pages, including on a phone.
- For local text, add an ordinary text block instead of renaming the site.
- Check that saved changes do not mistakenly affect the common menu or identity.
Apply a local style without changing site styles
If only a color, size or spacing should vary, check where you apply the setting. The editor’s Styles panel can define the appearance of the entire site or every block of a type. An individual block setting in your new header part has a different scope.
For the reference paragraph example, select that Paragraph in Contact Header and open its block settings. Choose an available local color without changing the global palette. Do not use Apply globally for this need. The expected result is a change limited to the variant’s paragraph, with readable contrast.
Keep the initial color or absence of a custom value so you can restore it. If the theme locks the setting, do not add a general rule targeting all headers. First check the customization available for this block.
- Open the new Contact Header part and select its Paragraph in List View.
- Open block settings, then its styles and colors section if available.
- Choose a local value and save this part.
- Check the target page and paragraph on a phone.
- Check that other paragraphs on the site have not changed.
- If necessary, restore the initial value on this block only.
Adapt the need to classic themes and builders
Classic themes can produce a common header through their files and options. A builder may apply a header to the entire site or a set of pages according to its conditions. The absence of native template part screens therefore does not mean sharing has disappeared; it simply uses another mechanism.
Do not transpose this guide’s Patterns and Templates menus to a product that does not provide them. Identify the theme or builder actually loaded, then its documented display conditions. A rule targeting all pages remains global, even if you opened it from the Contact page. Preserve the initial condition before a correction on a copy.
If you only need an announcement above one page’s text, its content may suffice without touching the site header. This solution remains useful with both classic and block themes.
- Open Pages → All Pages → the target page.
- For an announcement that is part of the content, add a Paragraph or Group at the start of this page.
- Save and check that it appears above the text.
- Check the reference page, which should remain identical.
- To undo, remove only this new block and save.
- If the element absolutely must belong to the header, identify the theme mechanism before changing its scope.
Validate both pages and retain the variant properly
The final check must establish that the change is local and header functions remain usable. A paragraph visible in the correct place does not prove the mobile menu still works. Also check links, logo and small-screen readability. If an old version remains visible, examine the cache actually used after confirming the saved objects.
Keep a note connecting the target page to its template and header part. A variant may become shared later if someone assigns it to other pages. Its name should indicate its purpose; it does not protect against reassignment.
The simplest rollback is to reassign the target page’s initial template. This does not require deleting shared templates or headers. If the variant is no longer needed, first check its uses before a separate cleanup.
- Open the target page and a control page in a logged-out session.
- Check that only the first displays the new sentence or layout.
- Test navigation links and opening the menu on a phone.
- Check that page content and footer are retained.
- Reopen settings to confirm the template and header names.
- Retain the initial template and configuration record until the variant is validated.
Check two pages before and after separation
To check separation on your copy, use two pages and a simple marker in the header. First check which pages use the common part, then assign a separate part only to the target template. The reference page must retain its initial header.
To read this difference in block theme code, compare the references in the two templates. Here, the second line appears in the target page’s template and corresponds to a parts/header-local.html file in the copy’s theme. A part created in the Site Editor may be saved in WordPress and use its own identifier.
<!-- wp:template-part {"slug":"header","tagName":"header"} /-->
<!-- wp:template-part {"slug":"header-local","tagName":"header"} /-->
Check the scope and return to the common header
On the copy, assign the described template to a single page. Open both addresses in a public session and compare a distinctive detail in each header, such as button text. Then check menu destinations, including when the Navigation block was copied with the header.
To return to the initial appearance, reassign the standard template to the target page. The check succeeds when both addresses again display the common part and each retains its own content.
Check objects still shared in a header copy
After duplication, inventory references instead of relying only on the header’s new name. The template part may be independent while containing a Navigation block using the common menu, a Site Logo or a synced pattern. Each may retain its own scope.
On the copy, start with an ordinary paragraph in the new part, then check the target and reference pages. Once this difference is confirmed, add the other elements one by one. For different links, select a separate menu; for a local illustration, use a suitable Image block. Do not change the site’s global identity to represent a single campaign.
Before saving, read the objects announced in the summary. If the common menu or a shared pattern appears when you intended to change only the variant, return to block selection and identify that reference. This native workflow is free and requires no additional builder. Rollback consists of reassigning the initial template, then checking both pages; it does not automatically delete the new objects that have become unused.
Sources and references
Use these references to check the features, requirements and limitations described. Reading documentation is not a practical test.
View 16 references
- WordPress: template parts and sharing ↗
- WordPress: creating and assigning templates ↗
- WordPress.com: shared header ↗
- WordPress.com: separate headers ↗
- WordPress.com: copying an existing template ↗
- WordPress.com: assigning a template to a page ↗
- WordPress.com: saving and restoring a template revision ↗
- WordPress: locating blocks in List View ↗
- WordPress: global styles and block settings ↗
- WordPress: Navigation block menus ↗
- WordPress: shared site title ↗
- WordPress: site logo ↗
- WordPress: Content block in a template ↗
- WordPress: template hierarchy ↗
- WordPress: classic and block themes ↗
- WordPress 7.1.4: logo saved at site level ↗