

Establish what is actually old
You have just connected a new domain to a migrated WordPress site. The browser opens the expected domain, but the page still displays the old version. The same symptom may come from an old DNS address, an incorrect assignment on the new server, a redirect or a cached page copy. Before changing a setting, note the entered address, the address remaining in the browser bar and what distinguishes the two versions. For example, the old homepage says “Bureau du quai”, while the validated copy says “Bureau de la gare”.
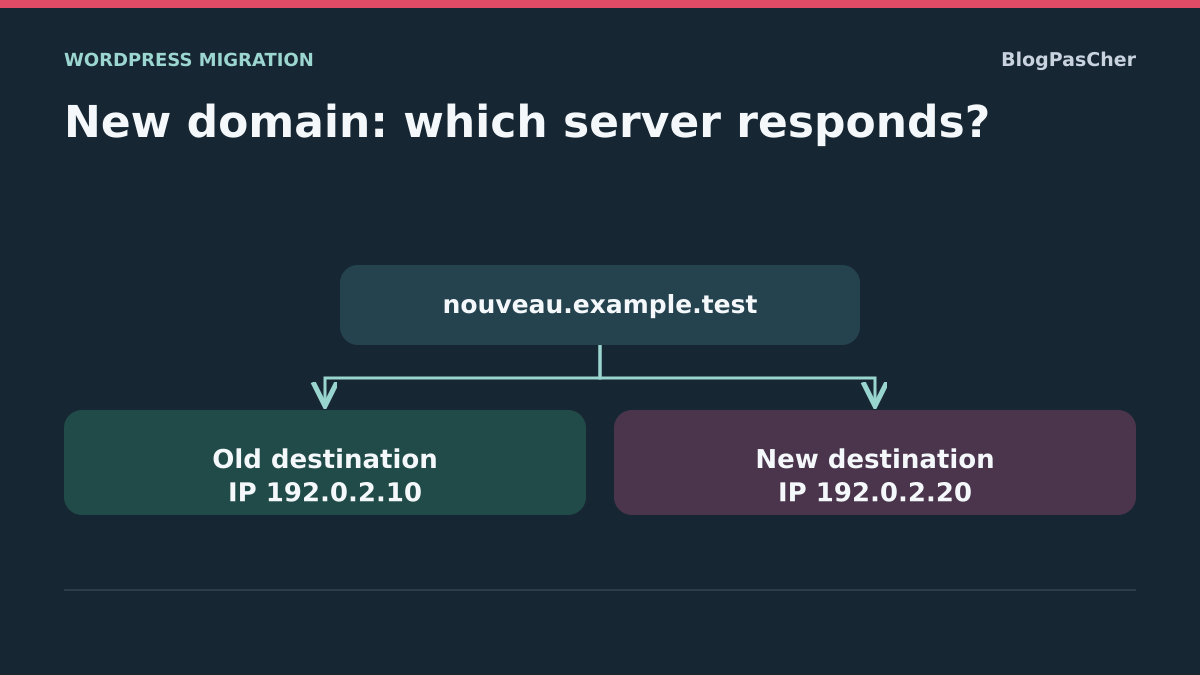
Choose two pages that should differ between servers, including the homepage and an internal page. View them while logged out, then record the date, network used and exact hostname, with or without www. A bookmark, saved redirect or page viewed in administration may suggest the browser requested a different address. Separately record the observed network destination and returned content. Two sites can share one IP address, with the server choosing which site to present according to the requested name.
Prepare rollback before making a correction. In interfaces you can access, save the name’s records, site assignment and relevant redirect rules. Record recent changes to preserve on the instance still receiving visits. Keep both servers available during diagnosis if you control them. If visitors can order or publish on both versions, determine where those writes arrive before moving more traffic.
Query the names actually serving the site
Compare DNS responses for the bare domain and www hostname if you publish both. For each, record existing A and AAAA records and any CNAME target. Correcting IPv4 leaves a problem if visitors still reach the old server over IPv6. If the provider uses a root alias, its panel may show a logical target while resolvers return one or more calculated addresses. Find the effective configuration instead of comparing only panel labels.
On Windows, the commands below query the computer’s resolver. Replace fictional names with the site’s names. On another system, A, AAAA and CNAME queries are available through dig if installed. An absent AAAA record may be normal if the service does not publish IPv6. If responses differ, also check the zone’s authoritative nameservers and values in the panel for the actually delegated zone. A registrar panel may still contain an old zone that no longer answers queries. To verify a response directly, for example add -Server 192.0.2.53 to the first command and replace that fictional IP with an authoritative nameserver’s IP for the zone.
The -NoHostsFile option ignores hosts-file entries during these measurements. It does not flush the DNS cache: always compare the resolver’s responses with the authoritative zone and TTLs.
Resolve-DnsName -Name nouveau.example.test -Type A -DnsOnly -NoHostsFile
Resolve-DnsName -Name nouveau.example.test -Type AAAA -DnsOnly -NoHostsFile
Resolve-DnsName -Name www.nouveau.example.test -Type CNAME -DnsOnly -NoHostsFile
Read differences between the zone and what visitors see
If authoritative nameservers still publish the old destination and the new server is ready, a record or alias needs correction. If the published zone is already correct but your resolver retains an old response, compare with another network and note the response’s remaining lifetime when available. Lowering the TTL now does not shorten an already cached response’s lifetime. Avoid repeatedly editing the zone during this comparison. That would make it difficult to attribute the result to one change.
If the domain uses a content delivery network or proxy, a DNS address different from the server IP is often expected. In the proxy interface, check which origin the name is assigned to and how www and non-www names are handled. The direct test below compares an origin you are authorized to test. Some origins accept only proxy requests or use a certificate intended for that connection. A direct failure may therefore be consistent with the deployment. Keep the normal public configuration and use the host’s preview or authorized logs if the origin does not accept direct connections.
To compare records, give each row a name, source and time. For example, note “www, office resolver, old address”, then “www, authoritative server, new address”. Then check whether both HTTPS accesses really serve the same page. DNS explains where a connection can go. Redirect headers and content show what the server or proxy does with it.
Compare both servers without publishing a DNS change
If you know each server’s address and can query them directly, use the same name in both requests. curl’s --resolve option maps that name and port to the selected IP for the command. The request’s HTTPS address remains the new domain. The name requested during TLS negotiation and the HTTP header therefore remain those of the site, allowing you to test the expected virtual host. Opening the IP in a browser or changing only the HTTP header of an HTTPS request may lead to the wrong certificate or site.
Replace the two documentation IPs with approved destinations and the name with the one you manage. The output saves content separately and displays headers and the IP actually contacted. If a local proxy is normally mandatory, ask the network team for an authorized way to compare origins. The commands disable proxy use for this name only and suit authorized direct access. On Windows, call curl.exe if your shell interprets curl as another command. Keep TLS verification enabled. If it fails, record the hostname or certificate-chain error before changing DNS. The target server must be prepared for the name according to the chosen hosting mode.
The --disable option must remain the first argument to curl or curl.exe. It ignores the personal curlrc file so the first response is preserved even if that file normally enables redirect following. Explicitly provide network and certificate parameters required by your environment.
curl --disable --noproxy nouveau.example.test --resolve nouveau.example.test:443:192.0.2.10 -sS -D - -o ancien.html -w "IP %{remote_ip} HTTP %{http_code}\n" https://nouveau.example.test/
curl --disable --noproxy nouveau.example.test --resolve nouveau.example.test:443:192.0.2.20 -sS -D - -o nouveau.html -w "IP %{remote_ip} HTTP %{http_code}\n" https://nouveau.example.test/
Compare headers before following a redirect
The commands do not automatically follow the response. A 301 or 302 with a Location header pointing to the old name proves a redirect is issued for this request. Its source still needs identifying. Compare the root and an internal page. Check the domain rule in the hosting panel, then the proxy or CDN rule if present. On the target server, inspect WordPress site settings and name-specific rules. The old domain may remain configured as primary even though the network connection reaches the new server.
To test this comparison locally, prepare two HTTPS test servers accepting the same fictional domain and displaying different markers. With --resolve, check the marker returned for each address. Optionally add a redirected path to distinguish the contacted origin from the final destination. Use a trusted certificate for testing. This exercise changes no DNS zone and does not measure visitors’ resolver caches.
If the new server responds 200 but displays a default page or another hostname’s site, check the domain’s assignment to the installation and directory actually used. If the response belongs to the correct installation but its text remains old, compare directly served content and normal-access content on a reference page. Change caching only after identifying which cache retains the content. A purge does not fix a DNS record or incorrect redirect.
Correct a self-hosted destination
In the new hosting panel, first assign the domain and www hostname, if used, to the migrated site. Check the selected directory or installation and expected certificate. Repeat the authorized direct test for those names and two paths. If the destination is ready and authoritative DNS still publishes the old value, change only necessary website records in the active zone. For example, change the relevant name’s A address and address its AAAA if it points to an obsolete address. Add IPv6 only if the new host supplied an address for this service.
Preserve mail and validation records. A website migration generally does not require changing MX records, email TXT records or nameservers if the current zone is usable. If the host requires delegation of the entire zone, inventory other services before applying it. Follow its documented certificate and proxy method. In particular, check that the main site’s pages are not accidentally being published from a restricted copy.
After the change, first query the active zone and compare with intended values. Then check normal access from two networks, noting differences. To roll back, restore the recorded values in that zone and restore the previous assignment only if changed. An already distributed response may remain cached until expiry. Therefore keep both destinations able to respond and coordinate resumption of writes with the data administrator.
Correct the assignment on WordPress.com
If the destination is WordPress.com, open the hosting dashboard and first select the site containing the expected version. Under Domains, find the exact name. A name added to the wrong site must be assigned to the correct one through the transfer-between-sites procedure. Setting a domain as primary on the old site does not move its content to the new installation. Before any change, open each site’s current address and confirm which contains the reference pages.
For a domain registered elsewhere, use the connection procedure and values displayed for that domain. Check the chosen method before changing nameservers or records. If the panel still requests validation or reports a certificate being prepared, note that status and first check connection requirements. When ready, use the domain menu to set it as the intended site’s primary address if that is what visitors should see. Then check the final address after redirection, homepage and an internal page while logged out.
If this fails, restore the previous primary address if this change is the confirmed cause and that address remains operational. If you also changed the registrar’s zone, separately restore the relevant values from your record. The platform manages its sites’ associations and certificates. Avoid transferring self-hosted virtual-host configuration commands to this dashboard.
Handle the correct server redirecting to the old domain
On a self-hosted installation, if the IP and assignment are correct but the first hop redirects to the old name, find the owner of that hop. If the proxy is already configured to rewrite the address, start with its rule. If WordPress generates the redirect, check Settings → General, particularly the WordPress address and site address. They may differ when an installation is in a subdirectory. If fields are locked, ask the configuration maintainer to check WP_HOME and WP_SITEURL in wp-config.php or environment-provided configuration. Keep both values before changing them.
First test the correction on the copy. Open the new domain, an internal path and the intended administration access. Check the first hop and final destination, then try the old domain if retaining it as a redirect. You want an exact destination, a valid HTTPS connection and a path that never returns to a previously observed hop. If a rule creates a loop, remove only the tested change, then record each path’s first Location header to determine who sends the next redirect.
If only some links send visitors to the old domain after clicking, open the page source to read their addresses. A link stored in content needs correction in WordPress or the component that generated it. A DNS change does not alter its value. Check this case separately from arrival at the homepage.
Complete the switch with a usable rollback point
Once the destination is corrected, repeat the same record for the bare domain, www hostname and control paths. Compare results from two networks and, if the service offers IPv6, check that route reaches the same site. With a CDN, also confirm that the public request still passes through the intended service. Ensure the expected name remains in the address bar and the certificate is accepted without an exception. Check the page that distinguished the versions and verify that administration access belongs to the correct installation.
Keep a short log with old and new values, the time of the latest change and the successful check. If the target version loses its certificate, publishes the wrong site or experiences a major outage, apply the prepared rollback. If the target has already received orders or new posts, suspend writes while recording that data before sending traffic back to the old instance. DNS rollback changes the access route without transferring the database or files created since the switch. Shut down the old server only after access and data recovery are verified.
If www and the bare domain open different sites
Compare exactly the same path on both names. In the example, nouveau.example.test/contact/?origine=menu opens the expected site and www.nouveau.example.test/contact/?origine=menu displays another installation. For each response, record the certificate, first HTTP status, Location value if redirected, then text specific to the received site. Identical DNS responses do not settle site selection. One IP can serve two different virtual hosts according to the requested name.
Choose the public name to retain and check that both names truly refer to the same site before joining them. If the secondary name intentionally displays another site, retain that assignment. In self-hosting, prepare the primary name on the intended installation and the secondary name in its own assignment or as an alias, depending on the panel. The certificate must cover both HTTPS names, including the one that will redirect. The browser checks the secondary name’s certificate before receiving the redirect. On WordPress.com, check that the domain is associated with the correct site, then use its primary-address setting and available domain options. If the secondary name is assigned to another site, check its use before changing that association.
On a copy, first configure a temporary redirect for only the secondary name to the primary one. Use the redirect field provided by the host or proxy responsible for the first hop. Request preservation of the path and query when that option is available. The rule must check the source name so the primary name serves the page directly. The following commands record initial HTTPS responses. Replace fictional names with the copy’s names and keep the path quoted. Then repeat with -L --max-redirs 4 to follow the redirect and check the final destination. To test the origin without changing DNS, also use the --resolve mechanism presented above, with an entry for each name.
The --disable option must remain the first argument to curl or curl.exe. It ignores the personal curlrc file so the first response is preserved even if that file normally enables redirect following. Explicitly provide network and certificate parameters required by your environment.
curl --disable -sS -D - -o sans-www.html "https://nouveau.example.test/contact/?origine=menu"
curl --disable -sS -D - -o avec-www.html "https://www.nouveau.example.test/contact/?origine=menu"
Validate both names and prepare undoing the change
The expected result is a correct page on the primary name and a hop from the secondary name to the same path on the primary. On the copy, have the temporary redirect checked for preservation of /contact/?origine=menu, then confirm its destination responds normally with the expected content. Remove the test rule and confirm the original behavior returns.
On your copy, also test the root and a second path. If accepting HTTP entry points, check that they reach the chosen HTTPS name without a loop. If every path becomes the homepage, return to the saved configuration and correct the rule before making it permanent. Once behavior is validated and the domain choice is lasting, use the permanent redirect offered by your infrastructure. If the switch fails, restore the initial rule or assignment and recheck both names. An already cached permanent redirect may continue to apply for some clients.
Compare the browser resolver with the system resolver
If Resolve-DnsName or dig shows the new destination while only one browser still opens the old one, check that browser’s secure DNS configuration. It may use a resolver different from the system’s. Note its provider and compare with another browser or network before changing the zone.
A private window alone does not guarantee a different DNS route. Likewise, a correct response from the computer’s resolver does not prove what the browser used. Keep the organization’s intended security setting; ask the network administrator for a comparison method if that choice is enforced. Once the destination is confirmed, check content and redirects as above. The goal is to explain two different observations, not permanently disable a protection mechanism to make the migration appear complete.
Sources and references
Use these references to check the features, requirements and limitations described. Reading documentation is not a practical test.
View 10 references
- curl: targeted resolution, headers and connection information ↗
- Microsoft: DNS queries with Resolve-DnsName ↗
- WordPress: migration to a new server ↗
- WordPress: WP_HOME and WP_SITEURL addresses ↗
- WordPress.com: connect an existing domain ↗
- WordPress.com: choose the primary address ↗
- Apache: virtual host selection ↗
- Cloudflare: DNS responses with and without proxying ↗
- Official technical reference for diagnosis ↗
- Mozilla: how DNS over HTTPS works ↗