

Distinguish an inactive interaction from an invisible panel
The mobile menu button is clearly visible, but nothing seems to happen when you tap it. Three situations may produce this result: an element intercepts the action, the opening code does not run or the panel opens while remaining hidden. Correction depends on this distinction.
The goal is reliable opening and closing with accessible links. Forcing the panel to remain visible through CSS does not repair its behavior: you might lose its close button, scrolling or focus return. Adding a second menu plugin without identifying the first can also create competing controls.
Choose a public page and reproduce failure on the first tap and again after a few seconds. Note whether a second tap works. Compare before and after scrolling, since a compact header may use another button. If the defect appears only after an internal page change, also keep that sequence.
Preserve current settings and work on a copy for attempts changing optimization or plugins. Browser diagnosis begins without site changes. This lets you separate interaction evidence, a resource error and a change actually responsible for recovery.
Identify the component and reproduce visitor context
With a block theme, locate Navigation in the relevant template’s header part through Appearance → Editor. With a classic theme or builder, identify the component producing the mobile button. The same three-line icon may represent entirely different systems; their scripts and settings are not interchangeable.
Compare the same address while logged out and logged in. Optimization tools may mainly process visitor requests, and the administration session may bypass some caching. A menu working for the administrator therefore does not establish that it works publicly. Repeat the check in another browser under the same conditions.
Also record consent-banner state and any browser blocker. A private window does not automatically exclude every extension: some may be permitted there. The goal is identifying context, not asking visitors to remove protections to use the site.
This identification initially requires only a browser. Template, CSS or plugin corrections then require corresponding permissions. On WordPress.com and multisite networks, permissions may be limited. Do not change roles or the entire security configuration to make a button interactive.
Observe button state before and after activation
Right-click the button in Chrome and choose Inspect. Select the actual button element rather than its inner icon. If the component uses aria-expanded, that attribute describes a collapsed or expanded state. Observe its value before and after activation without manually changing it.
A change from false to true indicates the component announces opening, but does not prove the panel is visible or usable. If state changes, examine panel styles and layout. If state remains identical, examine clicks, errors and initialization. A custom component may use another mechanism; absence of this attribute alone does not establish the cause.
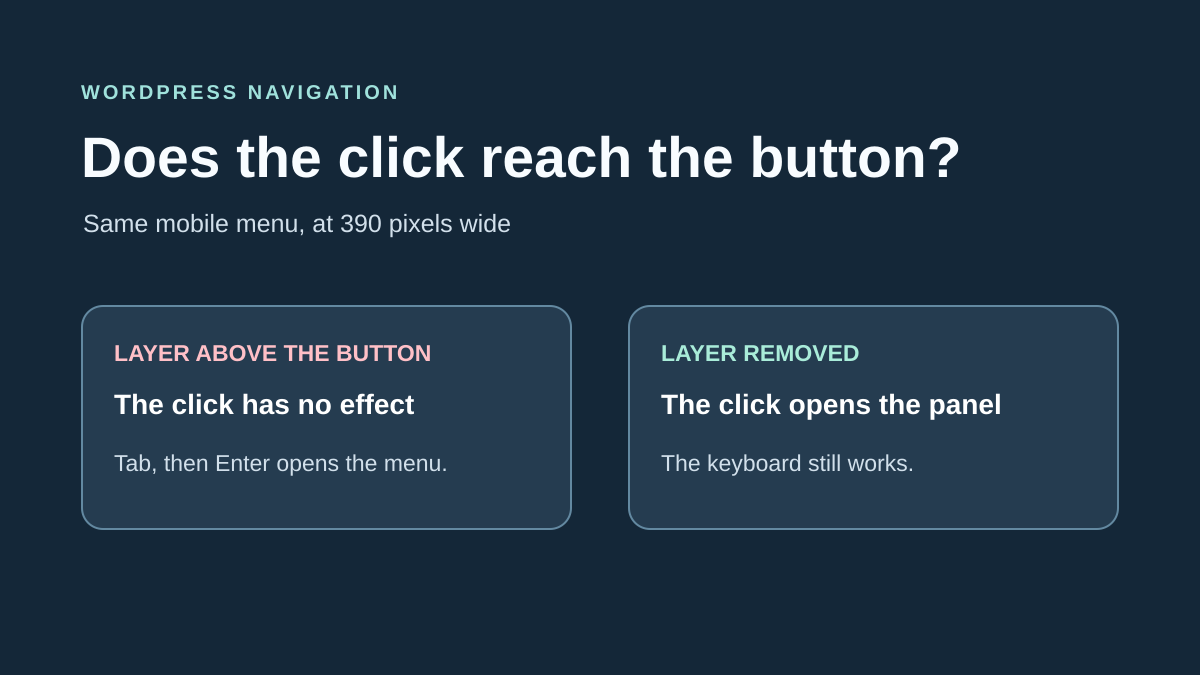
Also try the keyboard at a small width: Tab to reach the button, then Enter or Space according to its behavior. If the keyboard opens the panel but the pointer does not, an overlap or pointer rule becomes a useful lead. Confirm that result through inspection.
- Record the selected element and its initial state.
- Activate the button once, then observe state and panel.
- Close if possible and verify return to the collapsed state.
- Keep these observations to choose between presentation and interaction without manufacturing an open state in HTML.
Correct an overlap or an already-open but hidden panel
If state changes after activation, inspect the associated panel. Look for a parent with insufficient height, hidden overflow, transparency or positioning placing it offscreen. If the pointer seems to hit another element, also inspect the banner or group occupying the same area as the button.
Temporarily uncheck the suspected declaration in Styles to verify its effect. Reloading undoes this attempt. A pointer-events rule may prevent pointer actions reaching the button while leaving some keyboard uses possible. Do not apply it to the whole header to make one button accessible: you might disable other links.
Then correct the confirmed source. In Additional CSS, preserve the initial text and remove only the responsible declaration. The path is Appearance → Customize → Additional CSS for a classic theme, or Styles → three-dot menu → Additional CSS in the Site Editor for a block theme. For a builder setting, use its own layout panel.
The expected result is an actionable button and a panel visible only when open. Check closing and the page behind it. To undo, restore the preserved declaration or value. If no presentation change alters the result, return to scripts instead of adding extreme stacking values.
Record a reproducible JavaScript error
Open the browser Console before reloading the page. Clear old messages if necessary, reload and activate the button once. Record the exact message, affected file and when it appears. A load-time error has a different chronology from a click-triggered error.
A red line may come from an advertisement or service unrelated to the menu. It becomes a lead when it concerns the component or a targeted attempt links its disappearance to restored behavior. Do not automatically attribute the entire defect to the first visible error or paste a command suggested by an unknown message.
WordPress notably uses JavaScript modules for interactivity in some blocks, including Navigation. A correction considering only an old jQuery file may therefore miss the actual mechanism. Do not add a library or improvised click handler before identifying the active component.
You do not need to enable public PHP-error display for this first check. Keep only the relevant message and file URL, removing private information. An empty Console does not rule out an intercepted click or code that never loaded; continue with Network and settings comparison.
Check that expected scripts arrive
In Network, reload the page with tools open, then look at JavaScript resources and loading errors. Also inspect the complete list if a module does not appear in the intended filter. Record resource address, status and originating component.
A 404 response may correspond to an old filename retained in a cached page after an update. A 403 signals denial. A 200 status may still contain an HTML page instead of expected JavaScript; check headers and response when the error mentions an unexpected content type or syntax.
If the page still requests an old resource, refresh the affected cache and check the requested URL before replacing files. If the current resource is genuinely missing, preserve component state and restore its complete official version on a copy through its update mechanism. Do not retrieve an isolated file from another version: dependencies may differ.
A CSP error identifies a security rule refusing a resource or execution. Identify the intended source with that policy’s manager; do not disable all protection. The result must be a correct resource executed in the page context, followed by a working interaction. Download alone is not proof the menu opens.
Test JavaScript delay in an already installed LiteSpeed Cache
If LiteSpeed Cache is already used and the defect mainly affects visitors or the first tap, test its JavaScript processing on a copy. Do not install it to repair a menu. Check the requirements of the version offered by LiteSpeed Technologies before any update; this diagnosis concerns settings in your existing installation.
Preserve settings, optionally through LiteSpeed Cache → Toolbox → Import/Export → Export Settings. JavaScript deferral may postpone execution until HTML ends or wait for user activity, depending on the selected mode. This behavior warrants a targeted attempt without immediately disabling every plugin feature.
If the attempt restores opening, continue toward a targeted exception. Improvement after several simultaneous changes would not identify this setting as the cause. Keep other values identical during this comparison.
- Open LiteSpeed Cache → Page Optimization → JS Settings.
- Record Load JS Deferred, then choose OFF.
- Save changes.
- In Toolbox → Purge, use Purge All - CSS/JS if optimized files need refreshing; also refresh the affected cached page.
- Retest while logged out, from the first tap.
- Restore the initial value if nothing changes.
Keep a targeted correction instead of stopping optimization globally
When the test confirms a JavaScript processing effect, identify the actual resources and dependencies involved. A menu may load a main file and then other modules. Excluding a guessed name or an entire folder may be ineffective or unnecessarily remove optimization broadly.
In LiteSpeed Cache → Page Optimization → Tuning, JS Deferred/Delayed Excludes lets you list a resource excluded from deferral, one entry per line, as a URI or distinctive fragment without wildcards. JS Excludes concerns other processing such as minification and combination. Choose the control matching the attempt that restored the menu.
Preserve the initial list, add the justified exception, then reenable the tested setting. Save, refresh affected caches and check a first visit. If this tool does not process the files, an exception there will have no effect. Do not add a universal script list from another site.
The expected result is a working menu with other settings retained. To undo, remove only the added exception and restore the previous mode. If no reliable exception can be established, a documented less aggressive setting may remain temporarily preferable while awaiting a component fix; record that exact tradeoff.
Choose session diagnostics with Troubleshooting
Troubleshooting is a free standalone plugin by Marius L. J., known as Clorith. It lets you compare theme and plugin loading in a logged-in session. Check its current WordPress and PHP requirements before installation and confirm the result in a separate visit.
Prefer a copy if available. The tool does not replace a backup or isolate writes: a setting or content edited during diagnosis may remain changed after deactivation. Mandatory mu-plugins are not all removed from this context. Aggressive caches may also fail to respect the intended isolation.
Install the plugin through Plugins → Add New Plugin, checking name and author. Open Tools → Site Health → Troubleshooting, then Enable Troubleshooting Mode or its translation. The site may then use a default theme and present plugins as inactive for your session.
This initial state is not yet a test of your menu: retain the component producing it. Do not conclude a conflict has disappeared simply because the original menu itself disappeared. The next section describes comparison without changing site content or settings.
Compare plugins without losing the menu component
In the administration bar, use Troubleshooting Mode to restore your original theme in the diagnostic context. If the menu depends on a plugin or builder, also activate that component in the same context. Reload the public page within this session and verify it is the menu to diagnose.
Then reintroduce other plugins one at a time, testing opening after each change. Record the first addition that brings the defect back. Reversed, the comparison should show removal from the diagnostic context restoring behavior. This repetition limits conclusions based merely on a reload or different cache.
Exiting the mode restores normal loading but does not undo settings you edited. Do not change them during this investigation. If the problem occurs only for visitors, this logged-in comparison provides a lead, not final proof: reproduce the correction on a copy in visitor context.
- Retain the theme and essential menu dependencies.
- Check the button with this genuinely comparable minimum.
- Add one plugin at a time in diagnostic mode.
- Record the result and return to the last working state to confirm.
- Finish with Disable Troubleshooting Mode in the administration bar.
- Check the site in its normal configuration and a logged-out session.
Test initial loading and navigation between pages
Some defects occur at different times. A menu may work after a full reload and stop responding after an internal link. Conversely, delayed code may miss the first interaction and work later. Keep both scenarios in your checks to avoid validating an overly partial result.
On a site with client-side navigation, the browser may change content without repeating the entire normal load. Components must remain compatible with this mechanism. WordPress documentation distinguishes necessary modules from scripts not rerun in the same way during this flow.
Therefore open a page directly, test the button, follow an internal link and repeat. Then compare with a full reload of that second page. If only internal navigation fails, record the sequence and component managing that navigation. Do not add a second click handler on every page change: it could produce duplicate opening and closing.
Correction must occur in the component or confirmed optimization setting. The developer needs the exact route and observed errors to check initialization. This case does not justify changing permalinks or globally disabling WordPress interactions.
Validate complete opening and provide useful evidence
After correction, check several openings and closings by touch and keyboard. Focus must remain identifiable, links accessible and scrolling possible if the panel exceeds screen height. Also check closing and returning to normal page use, including required submenus.
Repeat while logged out, on a first visit and after a page change. Check an intermediate width and the affected phone. If you changed optimization, verify the result remains correct after cache rebuilding, not only during logged-in diagnosis. Keep starting settings to undo only the applied correction.
A useful report contains the page, width, exact sequence, observed button state, any Console message and relevant resource URL. Add the setting whose change restores behavior and whether the effect was confirmed in reverse. Remove cookies and session data before sharing.
Prevention means retaining these few tests after theme, builder or optimization updates. A mobile menu is navigation functionality, not merely an icon: visual presence is insufficient. Keep a single control source and document script exceptions genuinely required by the site.
Compare the touched point with the button receiving focus
An overlap can leave the button usable by keyboard while preventing clicks. The following protocol compares these interactions on your copy at the width where the defect appears. It does not assume a transparent layer actually exists on your site.
This contrast lets you test your header without replacing the menu. Open the public page at the affected width. Keep the pointer outside the header and use Tab to reach the button. Open and close the panel by keyboard. Then enable developer tools’ element selector and aim at the center of the visible button. In Elements, check whether the selected element belongs to the button or an area in front of it. A click in the selector inspects. Disable the selector before repeating the actual click.
In the browser Console, this read-only check returns the element occupying the center of the native Navigation block’s button. If the header contains several menus, identify the relevant button in the inspector before comparing. Record at the width where the button is visible, then repeat after temporarily removing the suspected layer in the copy’s styles.
(() => {
  const bouton = document.querySelector('.wp-block-navigation__responsive-container-open');
  if (!bouton) return null;
  const {left, top, width, height} = bouton.getBoundingClientRect();
  return document.elementFromPoint(left + width / 2, top + height / 2);
})()
Confirm the rule with a temporary change
To confirm overlap, compare the target at the same point before and after temporarily removing the suspected layer. Restored clicking must be accompanied by normal closing and continued usable keyboard navigation.
On your copy, temporarily hide only the suspected layer in the inspector or uncheck the rule placing it before the button. Repeat at the same point. If clicking works, identify the block or stylesheet causing overlap. Correct that element’s position or dimensions at its source. If the area contains a useful link or button, also check that control remains actionable. Reloading undoes the inspector attempt. To undo a saved correction, restore only the rule or block revision you modified.
Repeat the flow on the panel actually served
After correction, open a copy page as an anonymous visitor at the problematic width. Check the first click, appearance of links and closing action. Then open a second page using the same header. Repeat by keyboard without moving the mouse over the menu. The button must receive focus, the panel must open and closing must allow navigation to resume.
Touch emulation in Chrome does not replace a real-device test. For final site validation, also check the same sequence on the affected phone and browser. If the inspector already selected the button and the panel stays closed, proceed to the Console and Network checks above. Record the error or missing resource before trying a cache or script change.
Check the overlay setting before scripts
With the native Navigation block, first select the entire block in the header’s List View. Record its overlay setting: never, mobile or always, according to your version’s labels. This determines the expected presentation. A button from another menu or sticky header may remain visible while you edit different navigation.
On the copy, temporarily change only this setting to identify the component. Save the correct header, open the page at the affected width and observe whether the targeted button changes. Then restore the initial value. If only another button changes, continue identifying the template instead of adding JavaScript exceptions to the wrong component.
This free check uses WordPress without adding a second menu plugin. It does not itself repair a JavaScript error: it establishes which block to diagnose. After the actual correction, check the button at the page top and after scrolling, then open and close the overlay. Links must remain usable in both header states; success in only one still indicates a partial correction.
Sources and references
Use these references to check the features, requirements and limitations described. Reading documentation is not a practical test.
View 20 references
- Native Navigation and overlays ↗
- WordPress.com navigation settings ↗
- JavaScript diagnosis in the browser ↗
- WordPress Interactivity API modules ↗
- Client-side navigation compatibility ↗
- Chrome Console ↗
- Chrome network requests ↗
- Chrome computed styles ↗
- Accessible aria-expanded state ↗
- Intercepting pointer events ↗
- CSP policy blocks ↗
- Troubleshooting: diagnostic mode and limitations ↗
- Official Troubleshooting 1.0.2 code ↗
- LiteSpeed Cache: product status ↗
- LiteSpeed Cache page optimization ↗
- LiteSpeed CSS and JavaScript diagnosis ↗
- LiteSpeed purging and settings export ↗
- Accessible menus ↗
- Additional CSS in Styles ↗
- W3C CSSWG — Element targeted by a viewport point ↗